
There’s something undeniably magical about serving a dessert that makes your guests gasp with delight. That’s exactly the reaction you’ll get when you bring out these Miniature Baked Alaska Ice Cream Cakes! I’ve been perfecting this recipe for years, and I’m thrilled to share my fool-proof method for creating these impressive individual desserts that combine the best of ice cream and meringue in one show-stopping package.
What is Baked Alaska?
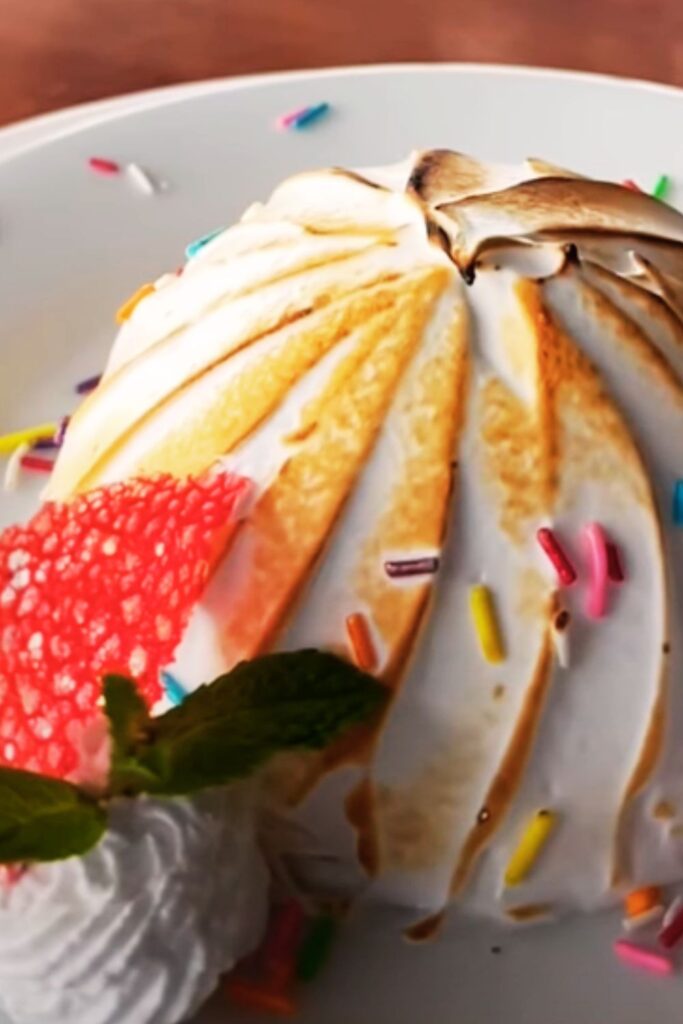
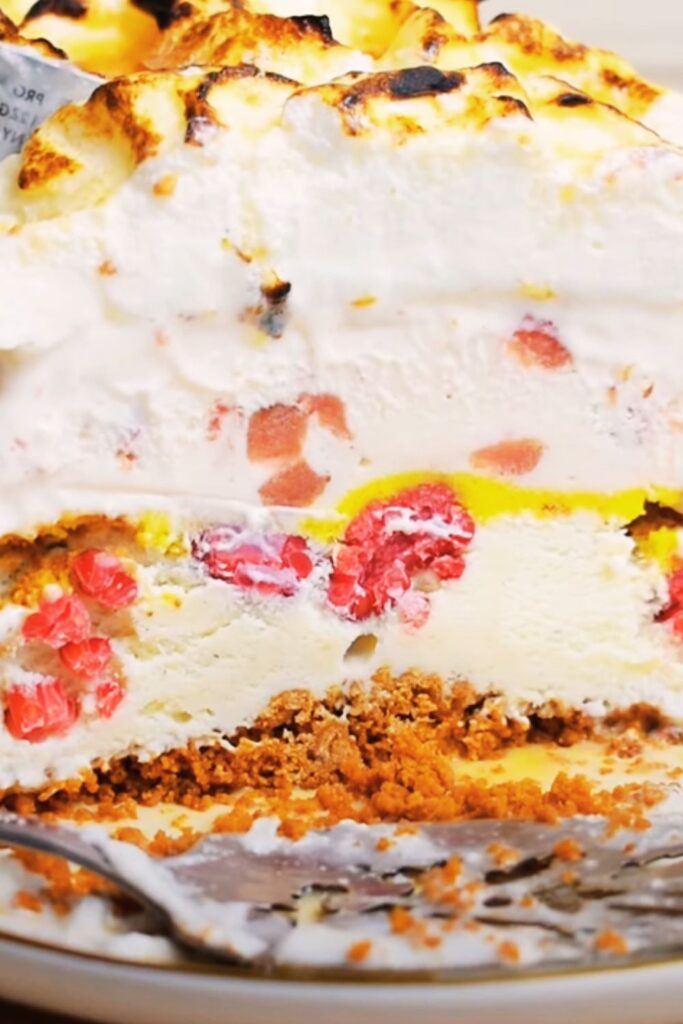
Before we dive into the recipe, let’s talk about what makes a Baked Alaska special. This classic dessert features ice cream encased in cake, then covered with meringue and briefly baked or torched until the meringue is golden but the ice cream inside remains frozen. It’s a study in contrasts—hot and cold, soft and crunchy, sweet and tangy—that creates a truly unforgettable eating experience.
The traditional version is made as one large cake, but I find these individual portions are not only adorable but also much easier to serve. Plus, making them as a set of 12 means you can customize flavors to please everyone at your gathering!
Why You’ll Love This Recipe
- Impressive presentation: Few desserts create the “wow factor” of a Baked Alaska
- Make-ahead friendly: Most components can be prepared days in advance
- Customizable: Mix and match ice cream flavors to please everyone
- Perfect portions: Individual servings eliminate messy cutting at the table
- Surprisingly approachable: Despite looking intimidating, the technique is straightforward
Equipment You’ll Need
Before getting started, gather these tools to make the process smooth and enjoyable:
- 12-cup muffin tin
- 3-inch round cookie cutter
- Kitchen torch (preferred) or oven broiler
- Stand mixer or hand mixer
- Offset spatula
- Pastry bags with star tips (optional but recommended)
- Kitchen thermometer
- Airtight freezer container
Ingredients Breakdown
For the Cake Base:
- 1 cup all-purpose flour
- 1 teaspoon baking powder
- ¼ teaspoon salt
- ½ cup unsalted butter, softened
- ¾ cup granulated sugar
- 2 large eggs, room temperature
- 1 teaspoon vanilla extract
- ⅓ cup whole milk
For the Ice Cream Center:
- 3 pints premium ice cream in your choice of flavors
- (I recommend using 3 different flavors for variety)
For the Meringue Topping:
- 6 large egg whites, room temperature
- ¼ teaspoon cream of tartar
- 1 cup granulated sugar
- ¼ cup water
- ½ teaspoon vanilla extract
Nutrition Information
For those who like to keep track of what they’re eating, here’s the approximate nutritional information per serving:
| Nutrient | Amount per Serving |
|---|---|
| Calories | 385 |
| Total Fat | 18g |
| Saturated Fat | 11g |
| Cholesterol | 75mg |
| Sodium | 175mg |
| Total Carbohydrates | 51g |
| Dietary Fiber | 0.5g |
| Sugars | 38g |
| Protein | 6g |
Note: Values will vary based on specific ice cream flavors chosen.
Step-by-Step Instructions
Day 1: Prepare the Cake Bases
- Preheat your oven to 350°F (175°C). Line a 9×13 inch baking pan with parchment paper, leaving overhang on the sides.
- In a medium bowl, whisk together the flour, baking powder, and salt. Set aside.
- In a large bowl, cream together the butter and sugar until light and fluffy, about 3-4 minutes.
- Add the eggs one at a time, beating well after each addition. Stir in the vanilla extract.
- Gradually add the flour mixture to the butter mixture, alternating with the milk, beginning and ending with the flour. Mix just until combined.
- Spread the batter evenly in the prepared pan. The layer will be thin, but that’s intentional!
- Bake for 12-15 minutes, or until a toothpick inserted in the center comes out clean and the edges are lightly golden.
- Allow the cake to cool completely in the pan, then use the parchment paper to lift it out.
- Using a 3-inch round cookie cutter, cut out 12 circles from the cake. If you don’t have enough space to get all 12, you can piece together some of the scraps for the last few bases.
I like to take my time with this step, ensuring each cake base is perfectly round and even. These form the foundation of our Baked Alaskas, so precision matters!
Day 1 or 2: Prepare the Ice Cream Centers
- Line your muffin tin with plastic wrap, leaving plenty of overhang on all sides.
- Remove your chosen ice cream flavors from the freezer and allow to soften slightly, just until scoopable but not melting.
- Working quickly, fill each muffin cup with ice cream, pressing it down firmly to eliminate air pockets. For visual appeal, I like to use 3-4 different flavors.
- Cover the tin with plastic wrap and freeze until completely solid, at least 4 hours or overnight.
- Once frozen solid, remove the ice cream rounds from the muffin tin by lifting the plastic wrap. Keep them frozen until ready to assemble.
Day of Serving: Final Assembly
- Place the cake rounds on a baking sheet lined with parchment paper.
- Working with one at a time, remove an ice cream round from the freezer, unwrap it, and center it on a cake round.
- Return each assembled cake base and ice cream to the freezer immediately. These need to be absolutely frozen solid before applying the meringue.
- Freeze for at least 1 hour or until ready to add the meringue topping.
Preparing the Meringue (1 hour before serving)
The meringue is where the magic happens in a Baked Alaska, so I take extra care with this step to ensure it’s stable and will hold up to the heat.
- In a heatproof bowl, combine the granulated sugar and water. Stir gently.
- Place the bowl over a pot of simmering water (not touching the water), creating a double boiler.
- Heat the sugar mixture, stirring occasionally, until it reaches 240°F (115°C) on a candy thermometer. This creates a sugar syrup that will stabilize our meringue.
- Meanwhile, in a stand mixer fitted with the whisk attachment, begin whipping the egg whites on medium-low speed until foamy.
- Add the cream of tartar and increase speed to medium.
- When the egg whites reach soft peaks and the sugar syrup has reached temperature, slowly pour the hot syrup into the egg whites while the mixer runs on medium-high speed.
- Continue beating until the meringue forms stiff, glossy peaks and has cooled to room temperature, about 5-7 minutes. Add the vanilla extract in the last minute of mixing.
Final Assembly and Torching (right before serving)
This is the moment where everything comes together—and it needs to happen quickly!
- Remove 3-4 cake and ice cream combinations from the freezer at a time, keeping the others frozen until needed.
- Working quickly, use an offset spatula or piping bag to completely cover each ice cream and cake combination with meringue. Make sure there are no gaps where the ice cream is exposed.
- If desired, create decorative swirls or peaks in the meringue using the back of a spoon or a piping bag fitted with a star tip.
- Use a kitchen torch to brown the meringue until golden all over. If you don’t have a torch, you can place them under a broiler for 1-2 minutes, but watch them like a hawk to avoid melting the ice cream!
- Serve immediately for the perfect contrast between the warm, toasted meringue and the frozen ice cream center.
Flavor Combination Ideas
One of the joys of making individual Baked Alaskas is the opportunity to play with different flavor combinations. Here are some of my favorite pairings:
| Cake Base | Ice Cream Center | Special Touch |
|---|---|---|
| Vanilla | Strawberry | Fresh strawberry garnish |
| Chocolate | Mint Chocolate Chip | Chocolate drizzle |
| Lemon | Raspberry | Lemon zest in meringue |
| Vanilla | Coffee | Cocoa powder dusting |
| Chocolate | Peanut Butter | Chopped peanuts |
| Spice Cake | Pumpkin | Cinnamon in meringue |
| Coconut | Mango | Toasted coconut garnish |
| Chocolate | Cherry | Amaretto in meringue |
| Almond | Pistachio | Crushed pistachios |
| Red Velvet | Cream Cheese | Red food coloring swirl |
| Lemon | Blueberry | Blueberry compote |
| Orange | Vanilla | Candied orange peel |
Time-Saving Tips
Creating these mini Baked Alaskas does take time, but with proper planning, they’re quite manageable. Here are my top tips for success:
- Plan ahead: The beauty of this dessert is that most components can be prepared days in advance.
- Cake bases can be baked up to 3 days ahead and stored in an airtight container.
- Ice cream centers can be molded and frozen a week in advance.
- Assembly line: Set up an efficient workflow for the final assembly and torching.
- Keep it frozen: Work with only a few pieces at a time, keeping the rest in the freezer until ready to finish.
- Meringue matters: The meringue acts as an insulator, so apply it thickly and ensure there are no gaps.

Troubleshooting Common Issues
Even with careful preparation, things can sometimes go awry. Here’s how to solve common Baked Alaska problems:
Problem: Ice cream melting too quickly
Solution: Ensure everything is thoroughly frozen before applying meringue. Work with only 3-4 cakes at a time, keeping the rest in the freezer.
Problem: Meringue not holding peaks
Solution: Make sure your mixing bowl and beaters are completely clean and free of any grease. Even a tiny bit of egg yolk or fat will prevent egg whites from whipping properly.
Problem: Meringue weeping or deflating
Solution: The Italian meringue method (using hot sugar syrup) creates a more stable meringue than simply adding granulated sugar. Don’t skip this step!
Problem: Uneven browning
Solution: Rotate the dessert as you torch it, keeping the flame moving constantly to avoid hot spots.
Problem: Soggy cake base
Solution: Apply a thin layer of melted chocolate to the cake rounds before adding ice cream. This creates a moisture barrier.
Serving Suggestions
These individual Baked Alaskas make for a stunning dessert presentation on their own, but if you want to elevate them further:
- Place each Baked Alaska on a pool of complementary fruit coulis
- Garnish with fresh berries or edible flowers
- Serve with a small glass of sparkling water with a twist of citrus
- For an extra-special touch, add a sparkler to each portion for a truly dramatic presentation
- Consider a dessert wine pairing for adult guests (a Sauternes or Moscato d’Asti would complement these beautifully)
Make-Ahead and Storage Options
While Baked Alaskas are best served immediately after torching, here’s how to work with timing constraints:
- Cake bases can be baked, cooled, and frozen for up to 1 month
- Assembled cake and ice cream (without meringue) can be frozen for up to 1 week
- Completed Baked Alaskas (with meringue but not torched) can be frozen for about 2 hours before serving
- After torching, these desserts should be served within 10-15 minutes for the optimal experience
If you do have leftovers, they can be carefully wrapped and frozen, but the meringue texture will change, becoming chewier rather than crisp.
Frequently Asked Questions
Q: Can I make these mini Baked Alaskas without a kitchen torch? Yes, you can use your oven’s broiler setting. Place the meringue-covered desserts on a baking sheet and broil for 1-2 minutes, watching constantly to avoid melting the ice cream. The results won’t be quite as precise as with a torch, but still delicious.
Q: What if I don’t have a muffin tin for molding the ice cream? Small bowls or ramekins lined with plastic wrap will work as alternatives. The goal is to create uniform ice cream portions that match the size of your cake rounds.
Q: Can I use store-bought pound cake to save time? Absolutely! Purchase a loaf of pound cake and use your cookie cutter to create the bases. Just ensure the cake is firm enough to support the ice cream.
Q: Why is my meringue shrinking after I torch it? This typically happens when the meringue isn’t fully cooked. The Italian meringue method using hot sugar syrup helps prevent this by partially cooking the egg whites as you whip them.
Q: Can I make these for a larger group? Yes! This recipe scales up beautifully. Simply double or triple all ingredients as needed. The work flow remains the same.
Q: How far in advance can I apply the meringue before torching? You can apply the meringue and keep the assembled Baked Alaskas in the freezer for up to 2 hours before torching. Any longer and the meringue may begin to weep or deflate.
Q: Are there any non-dairy alternatives for this recipe? Yes! Use your favorite dairy-free ice cream and substitute the butter in the cake with a plant-based butter alternative. The meringue is naturally dairy-free.
Q: What’s the history behind Baked Alaska? Baked Alaska was reportedly created in 1867 at Delmonico’s restaurant in New York City to celebrate the United States’ purchase of Alaska from Russia. The dessert’s cold ice cream center and warm meringue exterior were meant to represent Alaska’s cold climate and the surprise of finding such a treasure.
The Science Behind the Magic
I’ve always been fascinated by the food science that makes Baked Alaska possible. This dessert seems to defy physics—how can ice cream survive being put in a hot oven or under a torch?
The secret lies in the insulating properties of meringue. Egg whites, when whipped, create thousands of tiny air bubbles that act as an excellent insulator. Additionally, the sugar in the meringue helps to slow heat transfer.
When you apply heat to the exterior, it quickly browns the meringue, but that heat doesn’t have time to penetrate through to the frozen ice cream before serving. It’s the same principle that allows you to put your hand in a hot oven briefly without burning yourself—heat takes time to transfer.
This is also why working quickly and having thoroughly frozen ice cream is essential. The colder your ice cream starts, the more time you have before melting becomes an issue.
Final Thoughts
Creating these Miniature Baked Alaska Ice Cream Cakes might seem intimidating at first glance, but I hope I’ve shown that with some planning and patience, they’re entirely doable for home cooks. The joy on your guests’ faces when you present these individual frozen marvels is worth every minute of preparation.
What I love most about this recipe is how it combines old-world elegance with modern sensibilities. The individual portions are perfectly suited to today’s entertaining style, while the dramatic presentation maintains all the glamour of the classic dessert.
Whether you’re celebrating a special occasion or simply want to elevate an ordinary dinner to extraordinary status, these Miniature Baked Alaskas are sure to create a memorable moment. Enjoy the process, experiment with flavor combinations, and most importantly, savor the delightful contrast of warm, toasty meringue and cold, creamy ice cream!

